For my first crafty tutorial I wanted a little project for everyone to have a go at!

You will need: A printer, to print out the template.
Card stock or paper.
Glue (I use a glue gun, I'm very impatient!)
Scissors.
Pens if you wish to decorate
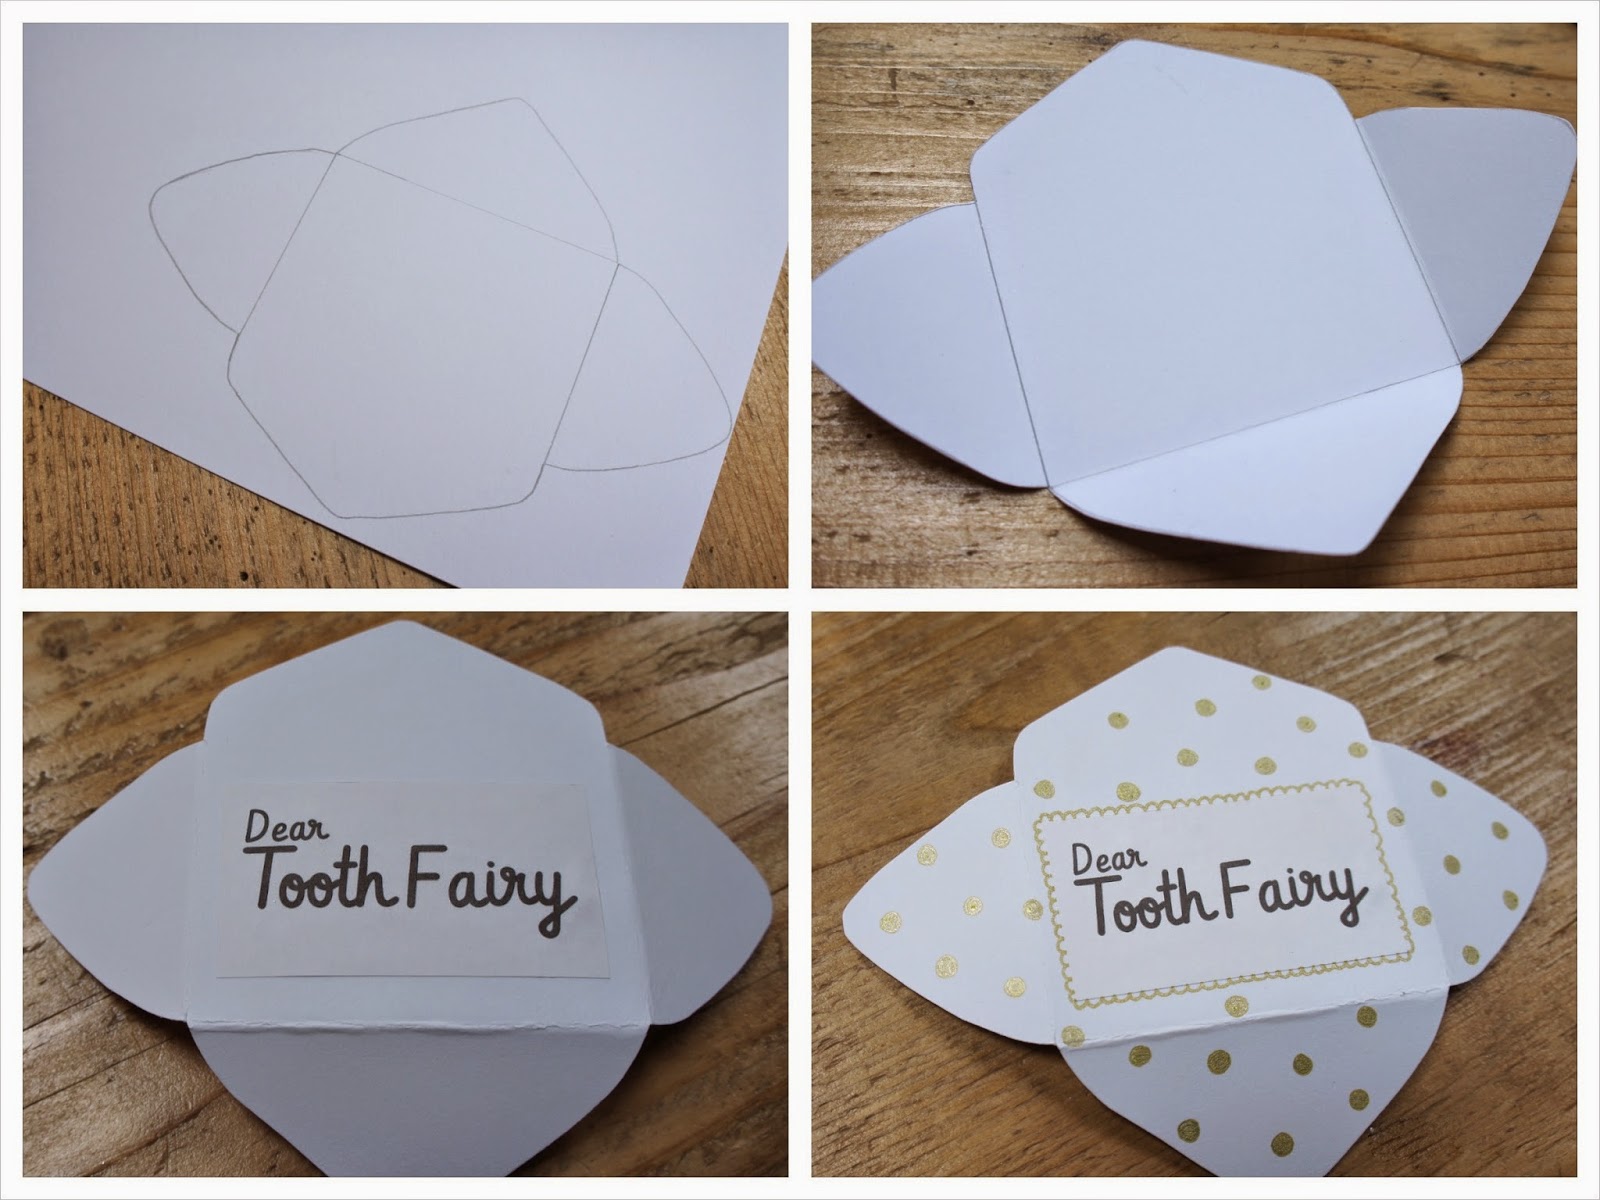
I then scored my folding lines and glued on the address panel.
As I used plain stock card, I decided to decorate using a gold metallic pen, drawing on sparkly gold dots to match my gold spandangly fairy wings.

At this point you can either seal the back of your envelope(the bottom and side panels) and glue the wings on the back or if you are able to use a craft knife, score along each side of the envelope so the wings can be pushed in,glued and therefore concealed.


Voila !!! So this is the basic design, I would love to see your own versions with different papers and personalisation.
If you would like to share please use the #mabelandmaymakes on social media x
The inspiration behind this tutorial came from my original designs for Fabric Tooth Fairy envelopes.


New blog looks fan-dabby-dozy! Love the little spoon pillow...
ReplyDeleteThank you Olivia x
ReplyDelete